Hills Mini Fold Down Folding Frame Clothesline Installation
Installing your Hills Mini Folding Frame Clothesline is quick and straightforward, but taking the time to do it right will ensure your clothesline functions flawlessly for years to come. In this guide, we'll walk you through each step of the installation process, from choosing the ideal location to securing the frame and attaching the line.

Whether you're mounting your clothesline on a brick, masonry, or concrete wall, this guide provides clear instructions and helpful tips to make the install as smooth as possible. By the end of this guide, you'll have your new Hills folding frame clothesline securely installed and ready to use! TABLE OF CONTENTS
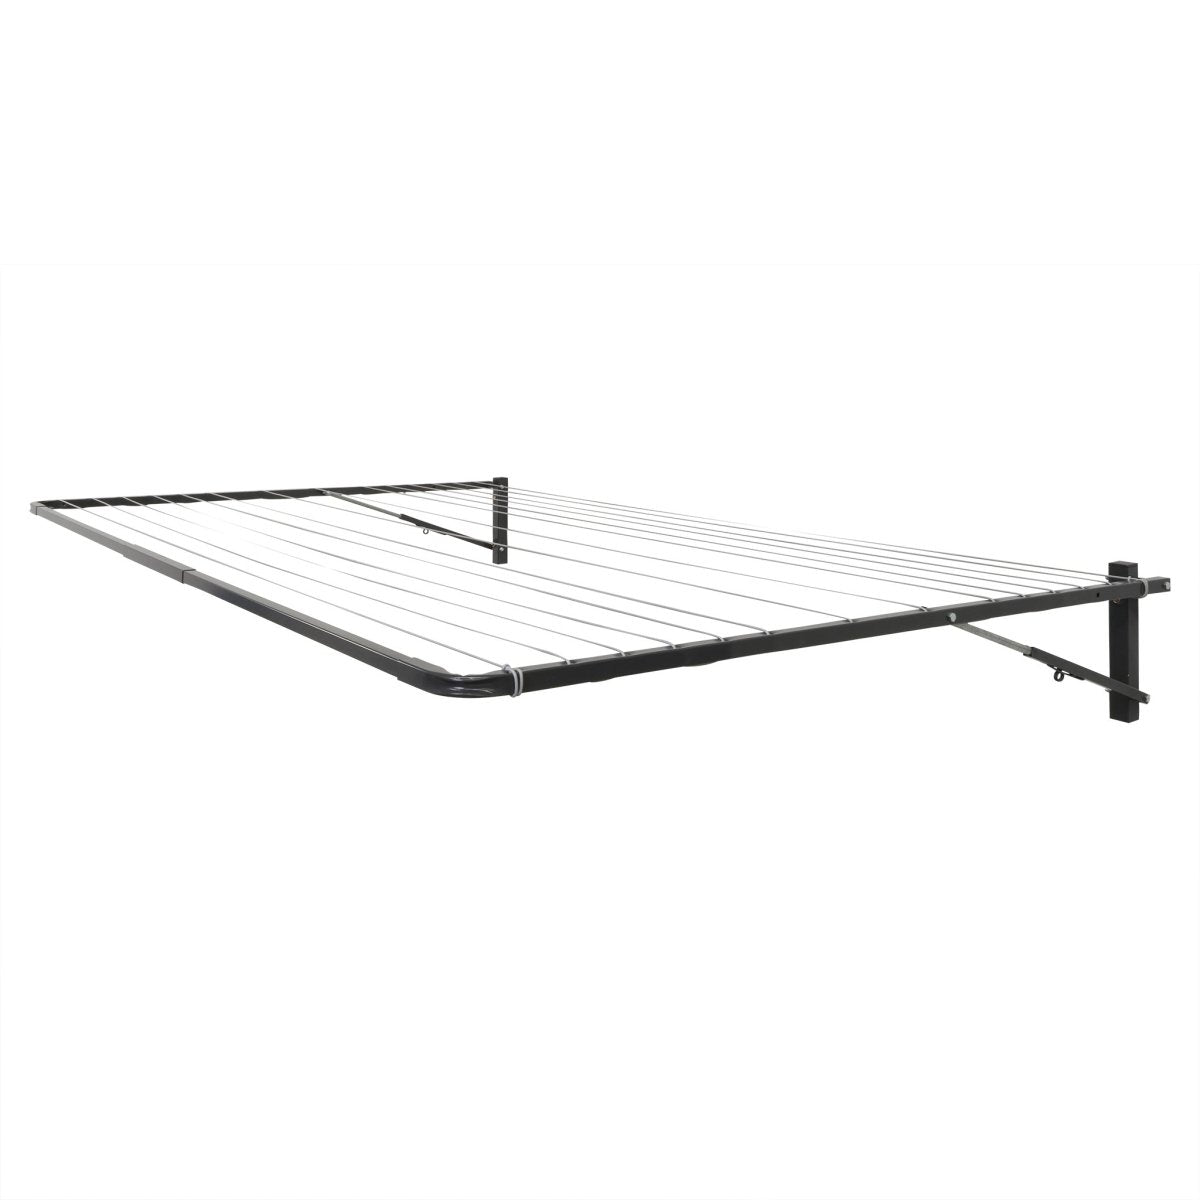
Installation Hills Folding Frame Clothesline - Mini Model
In this guide, for the mini hills folding frame clothesline installation we'll cover the key clothesline installation steps, from selecting the perfect location to securing the folding frame clothesline and attaching the line.

Tools
Before you begin the installation, make sure you have all the necessary tools and follow the step-by-step instructions supplied for the hills folding frame clothesline carefully to avoid any complications.
Important Information Hills Ground Mount Kit or Plated Kit
The Mini - Hills folding frame clothesline does not have a ground mount kit or plated ground mount kit option.

Important Information Hills Wall Fixing
The included Masonry Bolts are designed specifically for use on masonry, brick, or concrete walls, but if you're mounting to another material, such as wood, be sure to consult your local hardware store for the appropriate fixings.

Properly mounting the wall brackets and assembling the mini folding frame clothesline will ensure your clothes line is both stable and easy to operate, so you can start enjoying its benefits right away.
Installation of the Hills Mini Folding Frame Clothesline
Before you begin the installation of your new Hills Mini Folding Clothesline, carefully read through the included hills folding clothesline instructions.
For the best results, lay out all the parts and cross-check them against the product list to ensure everything is in place for the clothesline installation.

1.1 Select a Suitable Location
Select either an indoor or outdoor location preferably where the sun light will reach to ensure faster drying of wet clothes .
Ensure there is sufficient clearance and space around the new mini hills folding frame clothesline.
Hills clotheslines recommend leaving a space of 500mm on the long sides and 750mm from the front (Figure1).

1.2 Marking the Hole Centres
Mark the hole centres. Using the brackets as templates, mark the hole centres.
The hole centres should be exactly 2353mm apart and Hills recommend the lower hole centres are in line with the users head height.
Use a spirit level to ensure the hole centres are level vertically and horizontally (Figure 2).

1.3 Adhere the Hills Folding Frame Clothesline Wall Brackets.
If you are mounting to masonry, brick or concrete, drill 10mm holes at the marked points and secure into position using the M8 × 70
Masonry Bolts supplied with the folding frame clothesline (Figure 3).

If using alternative fixings, secure and adjust the brackets in an appropriate manor for your substrate.
Assembly of the Mini Hills Folding Frame Clothesline
2.1 Hills Folding Frame Clothesline Arm Caps
Slide the x4 Arm End Caps onto the end of each arm and strut, then secure the arms and struts into to the wall brackets using the x4 Chicago Bolts (Figure 4).

2.2 Hills Folding Frame Clothesline Assembly
Moving from right to left and keeping weight supported the whole time:
1 Insert x 1 Front Bar into the right arm
2 Slide the Joining Bar onto the Front Bar
3 Slide the remaining Front Bar into the Joining Bar
4 Carefully slot the assembled bars into the left arm corner.
The clothesline frame will now be fully assembled (Figure 5).

Attaching the Hills Mini Clothes Line Cord
3.1 Threading the Hills Clotheslines Cord
Your Hills Folding Frame Clothesline comes with the Line Tensioner and Line pre-attached.
Thread the clothes line cord through the folding frame clothesline in alternating directions, keeping tension as you go (Figure 6).

3.2 How to Tie Off the Hills Clothesline Cord
Follow the below steps to tie off (Figure 7).
Align the line tie off with the hole in the hills clothesline arm, and pull the line straight through the frame and line tie off.
Pull the line tight and down, then wedge it right to secure it into the gap at the base of the line tie off.

Thread the line back and forth through the holes on the inner of the line tie off, so it finishes back on the inside of the arm.
Wedge it again, this time into the opposite side gap at the base of the line tie off, and snip off the excess.
Do not cut, until you are happy the line is secure.
3.3 How to Tension Your Mini Hills Folding Frame Clothesline
To tension the line, rotate the line tension dial in a clockwise direction until the lines are taut (Figure 8).

Adjustments
You may need to adjust the lines when you first hang your wet washing out to dry. This is the ideal time to check the cord tension and adjust accordingly.
Operating Hills Folding Frame Clotheslines
4.1 Raising the Mini Folding Frame Clothesline
To raise, fold and lock, grip the frame in the middle and lift upwards until you hear both folding brackets 'click' (Figure 9).

4.2 How to Close the Hills Mini Folding Frame Clothesline
To lower and close the hills clothesline, grip the frame in the middle and raise slightly above your head until you hear both folding brackets 'click! Then guide the frame into the folded closed position (Figure 10).

Congratulations, you have installed your quality Mini Hills Folding Frame Clothesline is now complete! You’re all set to start enjoying the convenience of your new clothesline. We hope you have found this guide helpful and easy to understand.

Hills Mini Folding Frame Clothesline Specification
|
Brand: |
Hills Clotheslines |
|
Model: |
Mini Fold Down Clothesline |
|
Hills Mini Clotheslines Colours: |
Colour 1 Monument Colour 2 Surfmist |
|
Hills Mini Clotheslines Suitable For: |
Small Family or 1 - 2 People |
|
Hills Mini Clotheslines Number of Lines: |
6 Lines of Drying Space |
|
Hills Mini Clotheslines Length of Line: |
8.4m of Drying Space |
|
Hills Mini Clotheslines Width: |
1400mm |
|
Hills Mini Clotheslines Depth: |
680mm |
|
Hills Mini Clotheslines Sheet Size: |
Single Sheet Folded |
|
Hills Mini Clotheslines Assembly Required: |
Yes |
|
Hills Mini Clotheslines Fasteners / Anchor Bolts to Wall: |
Masonry wall fixtures included |
|
Hills Mini Clotheslines Ground Mount Kit: |
|
|
Can the Width of the Hills Mini Clotheslines be Reduced: |
Yes, you can reduce the width |
|
Hills Mini Clotheslines Made in: |
|
|
Hills Recommended Weight Capacity: |
20Kg |
|
Hills Mini Clotheslines Manufacturer's Warranty: |
Lifetime on Frame / 12 Months Cord |
|
Hills Mini Clotheslines Locations for Clothesline Installation: |
Outdoor Walls |
|
Hills Mini Clotheslines Professional |
Not for the Mini Hills Folding Frame Clothesline |

Free Delivery of Clotheslines
At The Clothesline Store, we guarantee the fastest dispatch to ensure the quickest delivery of clotheslines, by operating our own national clothesline warehouse. Don’t take our word for it—check out our Google reviews!

As Australia’s largest private stockholder of clotheslines and accessories, we ship in-stock items the same or next business day. Unlike other retailers who rely on third-party distributors, our dedicated team handles every order directly, ensuring superior speed and reliability.

With our extensive range of great quality clotheslines stored in our own clothesline warehouse and national centres, we deliver faster and more consistently.
Hills Clotheslines Full Product Range
Hills Premium Folding Rotary Clotheslines: 8 Line, 7 Line, 6 Line
Hills Everyday Folding Rotary Clotheslines: Everyday 37, Everyday 47
Hills Fixed Head Rotary Hoist Clotheslines: 7 Line, 6 Line
Hills Retractable Clotheslines: 7 Line Retracting, 5 Line Retracting
Hills Premium Fold Down Clotheslines: Single, Double, Long, Compact, Mini
Hills Everyday Fold Down Clotheslines: Everyday Double and Single
Hills Soft Grip Pegs
Hills Peg Bag